The Domain Name System (DNS) is the Internet’s address book. DNS directs web traffic by mapping domain names like example.com to IP addresses like 192.0.2.8.
How DNS Works
Before adding any DNS records, you should learn the basics of DNS.
In your client panel account find the button 'Manage DNS' in the top menu bar. It will redirect you to the DNS management page.

New Zones
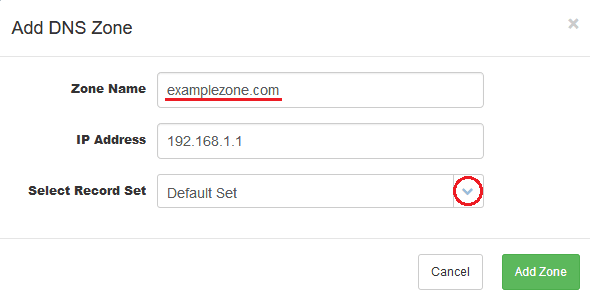
On the DNS management page, clients may add, remove and edit DNS zones. To do so, simply type in the name of the zone and choose IP address from the list of available IP addresses or enter your custom IP.
From the dropdown menu clients can also define record sets. Record sets can be used as a default when setting up a new zone. This saves you time when setting up your domain.

Available actions on a zone:
- edit existing zone (the pen & paper icon)
- delete zone (the garbage can icon)

Add Record
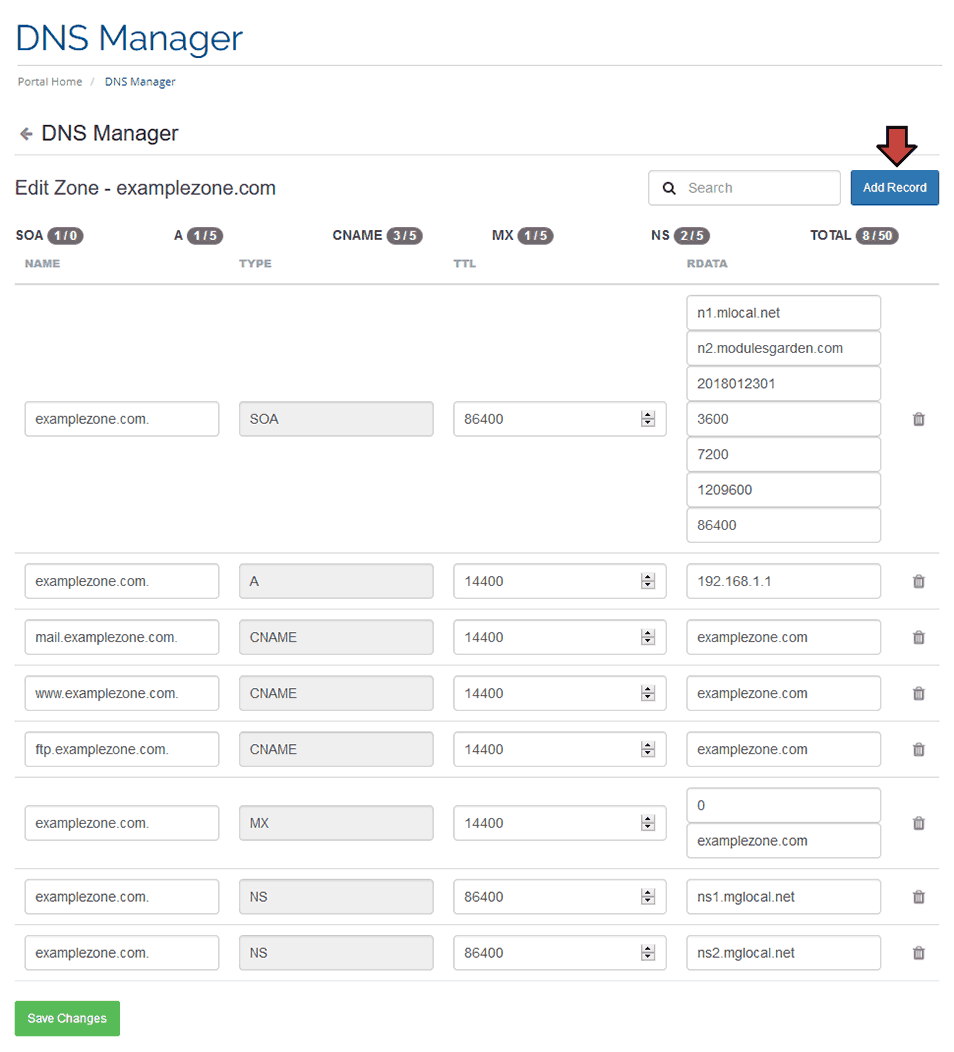
Click 'Edit' to see details of the zone, you may edit the zone here and add new records if limits allow you. The following page shows the current records for your domain. Click on "add record" to add an additional record to your domain.
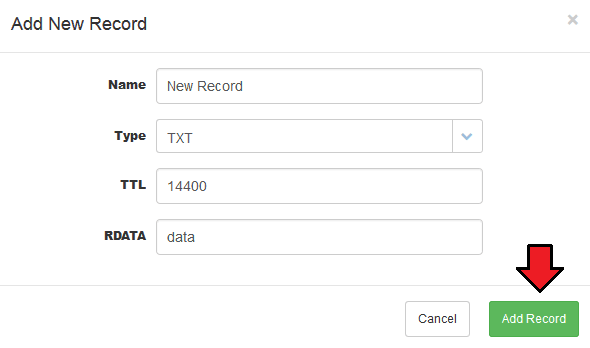
Enter a new record's name and select the record type from the dropdown menu. The following record types are available:
- A Records
- AAAA Records
- CNAME Records
- MX Records
- NS Records
- SRV Records
- TXT Records
- SPF Records
Enable DNSSEC
DNSSEC is available for all our shared hosting, enterprise hosting and reseller hosting plans. If you use a VPS or dedicated server you will have to ensure that your server is configured correctly to use DNSSEC.
The configuration of your virtual private server or dedicated server falls outside the scope of this article.
To enable DNSSEC, please click on the 'red DNSSEC button'.
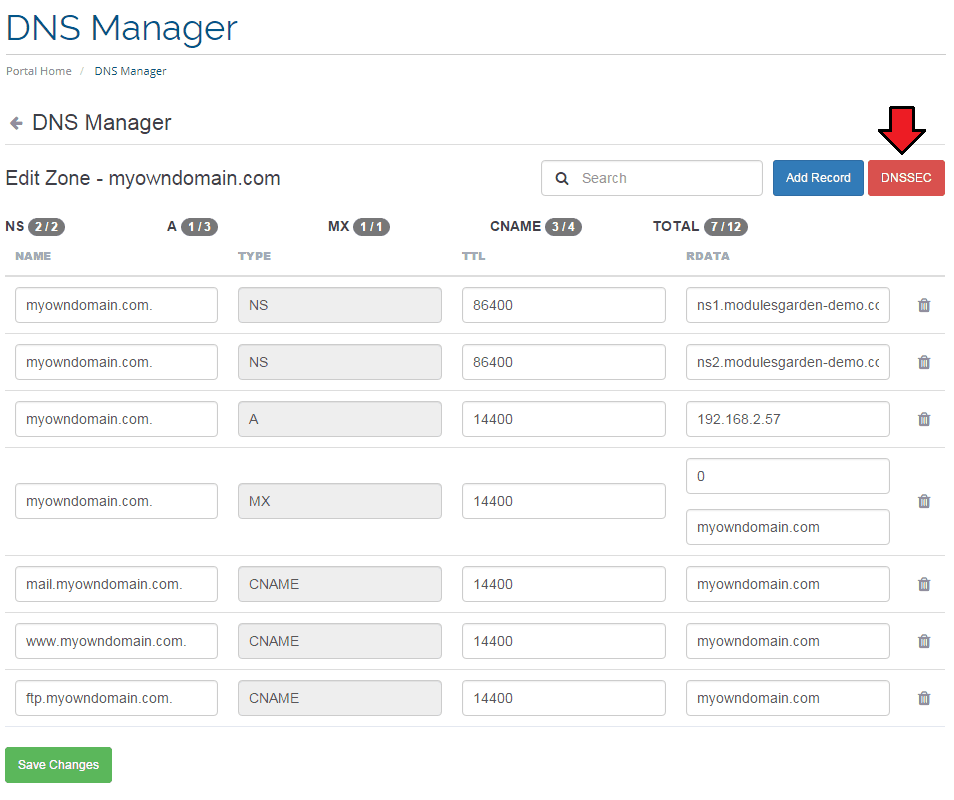
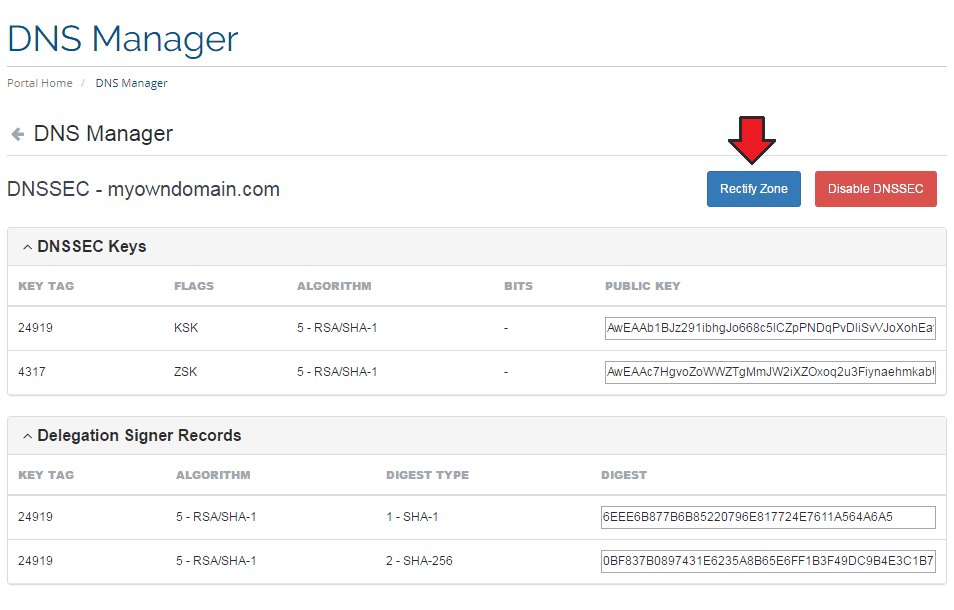
After clicking on the red 'enable DNSSEC' button you will then see DNNSSEC details page for your zone. This includes your encryption keys and delegation signer records.
Press 'Rectify Zone' to comply with DNSSEC.
Add DNS Record Sets
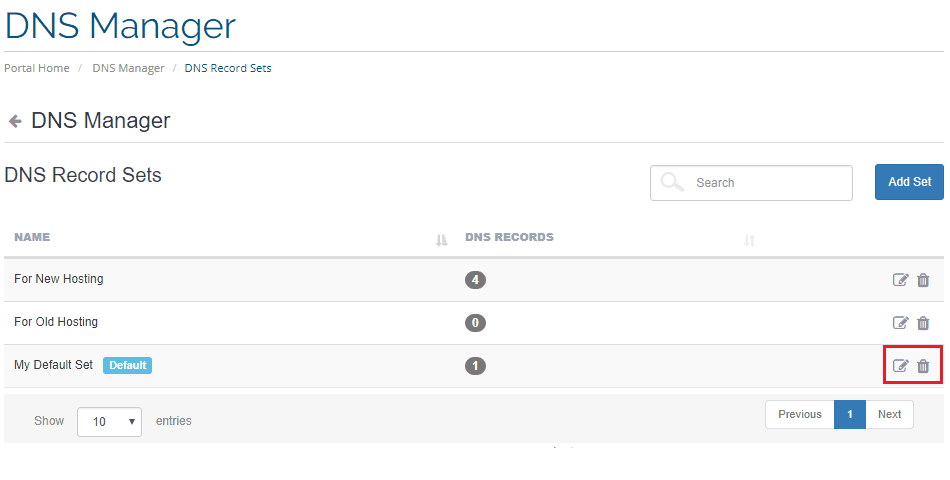
DNS Record Sets allow for predefined defaults when creating new zones. You can add and manage records sets in the DNS Record Sets section by heading to the 'DNS Record Sets' section as shown below.

Click the 'Add Set' button and provide the necessary details.
It can be also set as default.
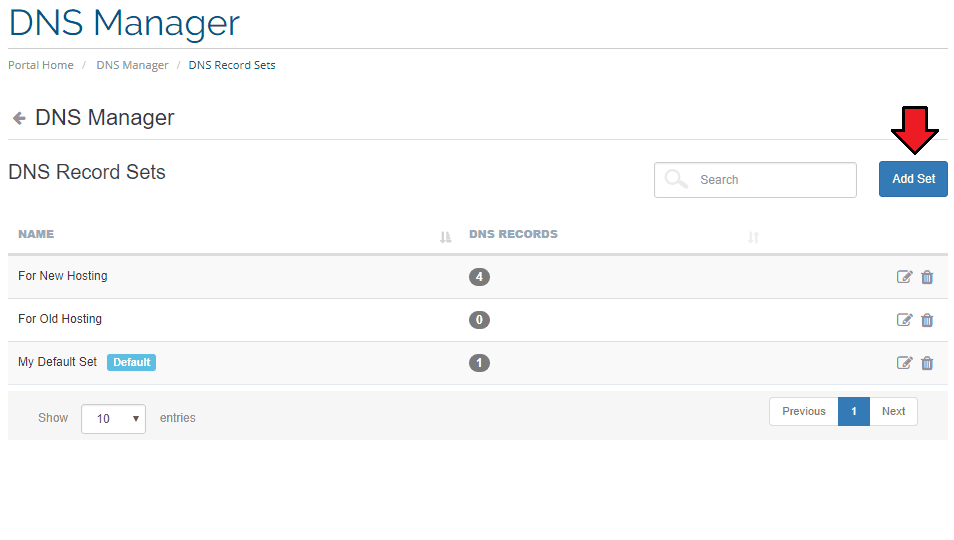
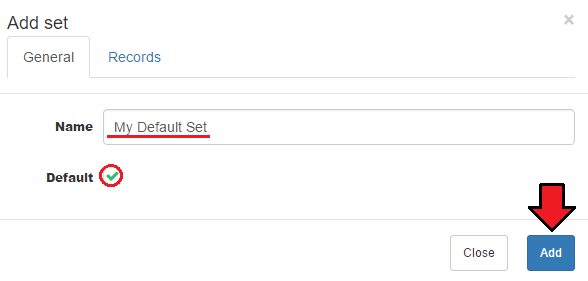
Your newly created DNS record should appear on the list. You may also edit or delete your record sets completely.
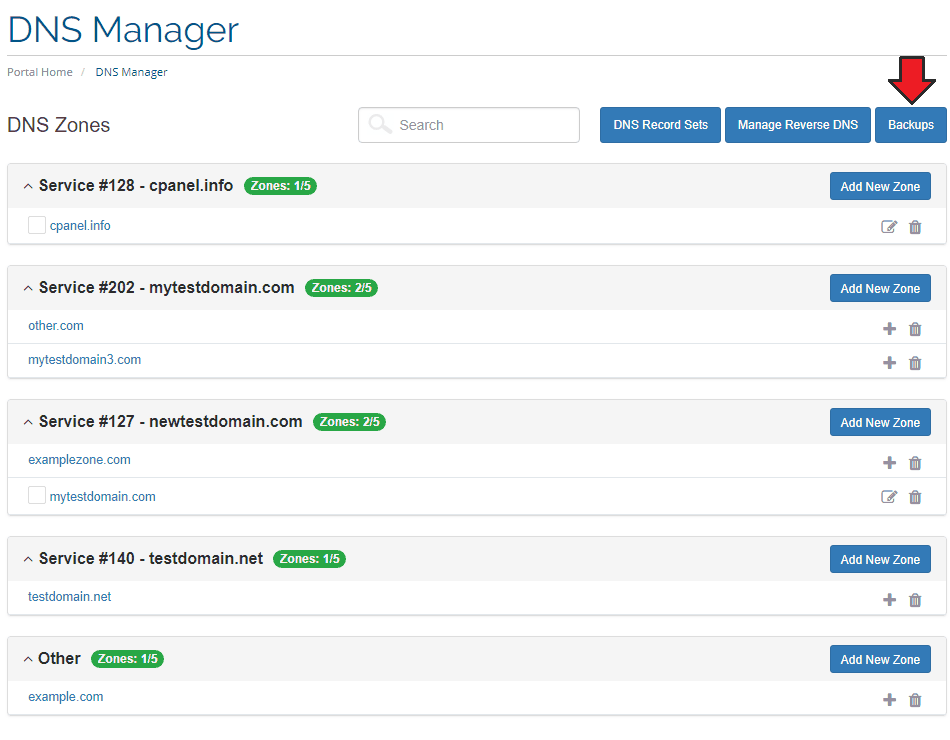
Backups
You can create, download and upload your zone backups. Move to the mentioned section to see the available options.
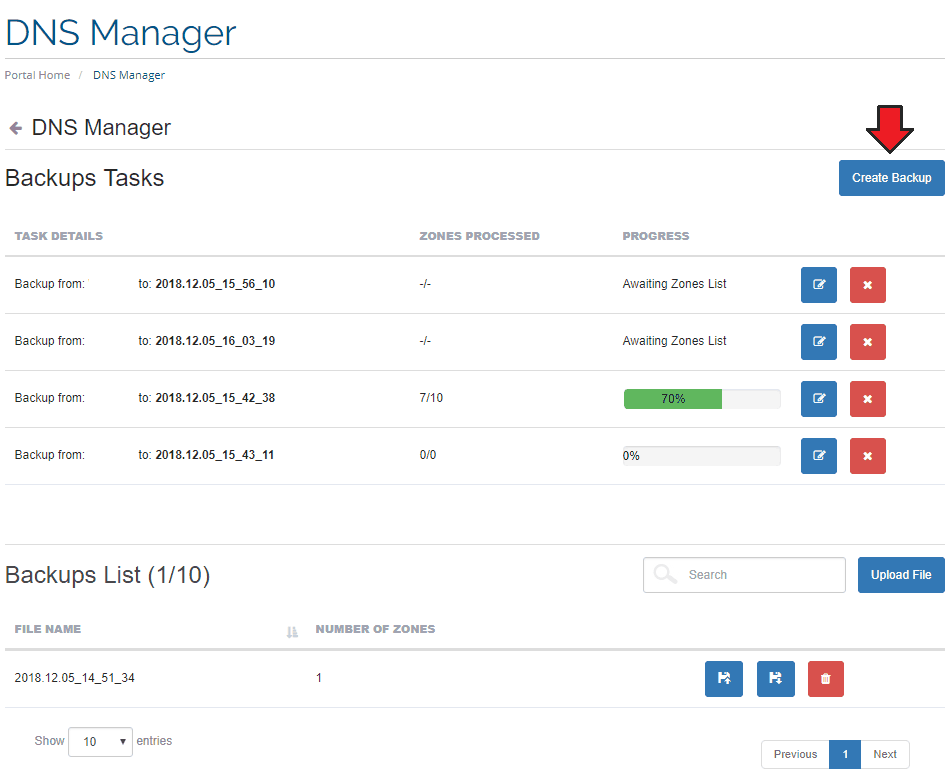
There are two sections available on the following page: your current "Backups Tasks" and a "Backups List" section which includes a list of your archived backups.
Press the 'Create Backup' button to start.
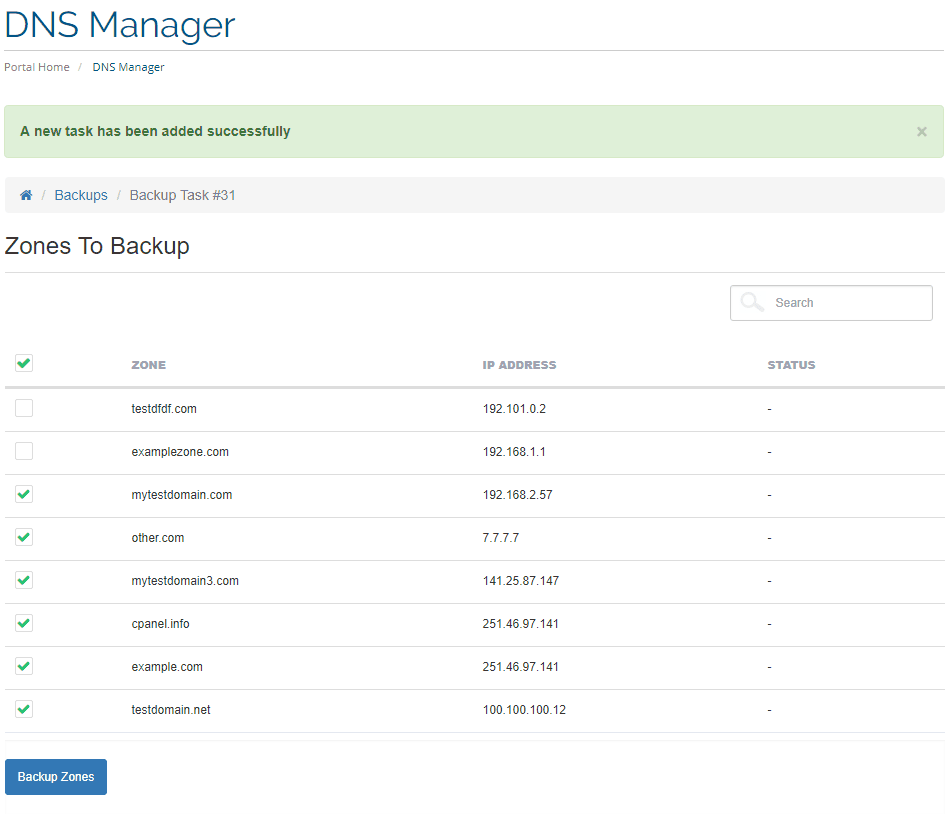
A new task is added immediately. Now, all you need to do is select the zones to be backed up from the list of available zones.
Press the 'Backup Zones' button when ready.
Backups Tasks
The just added task to back up the zones is now visible on the task list. There is also information on the task progress and the number of zones that have already been processed.
To see details, press 'Show List' button.
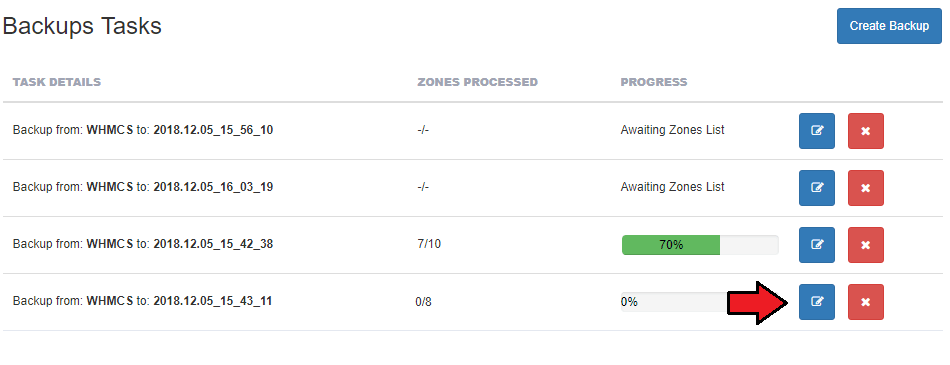
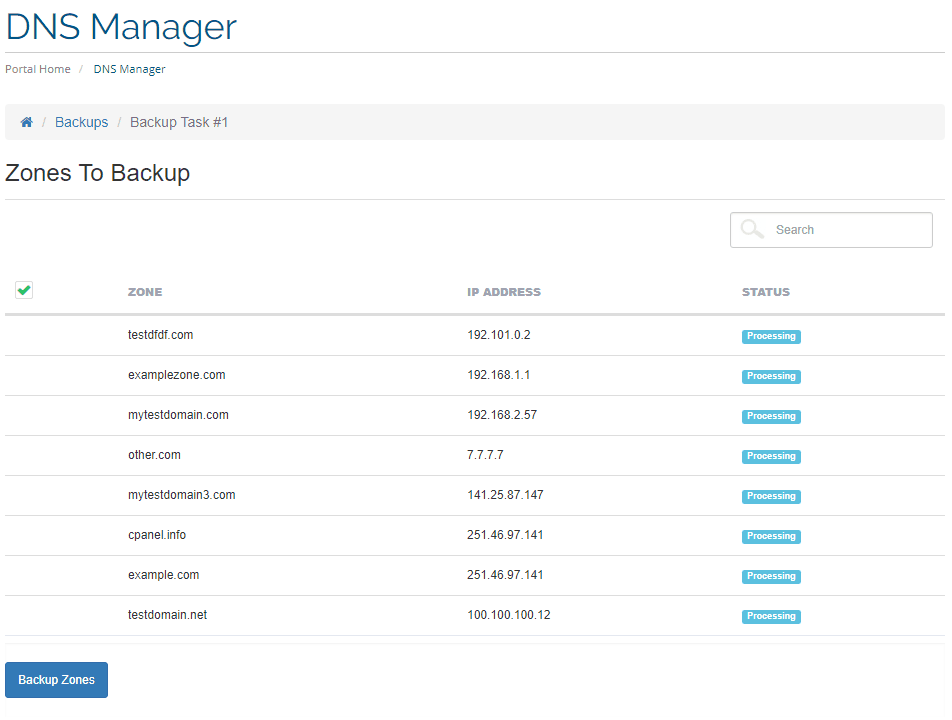
You will be moved to the list of currently maintained zones. You can check the status of each one of them.
Backups List
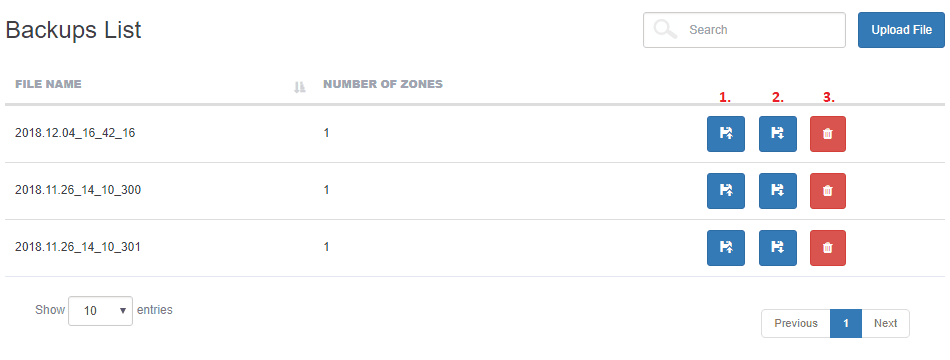
Here you will find a list of all files with a number of backed up zones. In order to upload a ready made backup file, simply press the 'Upload File' button.

Select the appropriate file from your harddrive, do keep in mind that only previously downloaded backup files can be used.
Backup files can be easily edited in any editor to adjust the records inside it to your needs, but you must be careful and stick to its formatting.
Use the action buttons to start the tasks:
- Restore backup file. This action, when stared, is also visible on the list of tasks above.
- Download the file.
- Delete the file.
